The physical removal and replacement of a computer graphics card can seem like a difficult task, one that you might not have done before or one where you might be worried about damaging your PC, but I’m here to tell you installing a GPU isn’t terribly complicated.
If you’ve just bought a new card, be it an AMD, Nvidia or Intel Arc series graphics card, you can use this guide as either an easy beginner’s walkthrough or a basic faults explainer (in case something isn’t going right during the installation). Grab a screwdriver and let’s jump in.
How to install a GPU
1. Uninstall old GPU drivers and turn off the PC
If you previously had a GPU, you can uninstall the old GPU drivers using this guide. Unplug any cables and move the PC to an accessible surface, if necessary.
2. Physically remove your old GPU (if you have one)
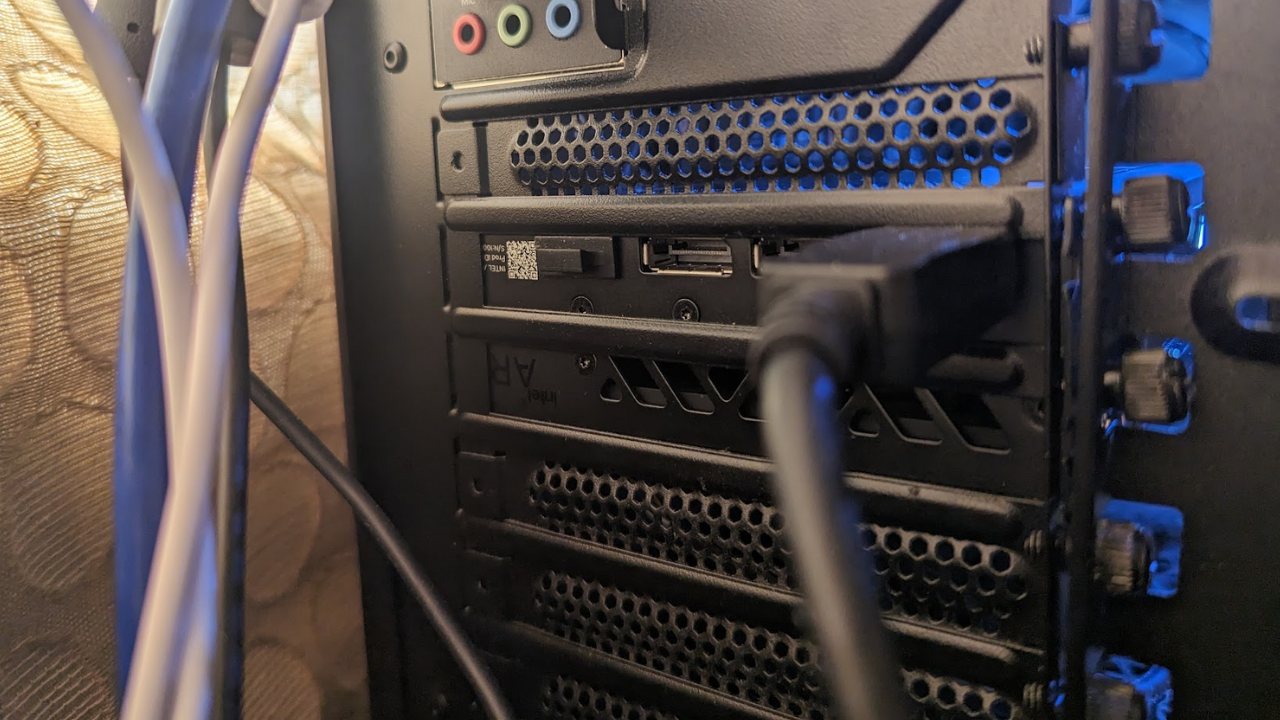
If you need to remove your old graphics card, unplug the VGA cable(s), unscrew it from the PCIE case slots on the back (as shown below), push the tab on the PCIE port so that it releases, and gently slide the old GPU outward.
3. Remove the PCIE case slots from the back of your PC case that your GPU will be using
These align with the topmost PCIE 1×16 slot. You don’t need to remove all of them, but they may all be protected by a shield, which you need to also remove.
4. Pull the tab back on the top-most PCIE 1×16 port in your motherboard
This locks the GPU’s right side in.
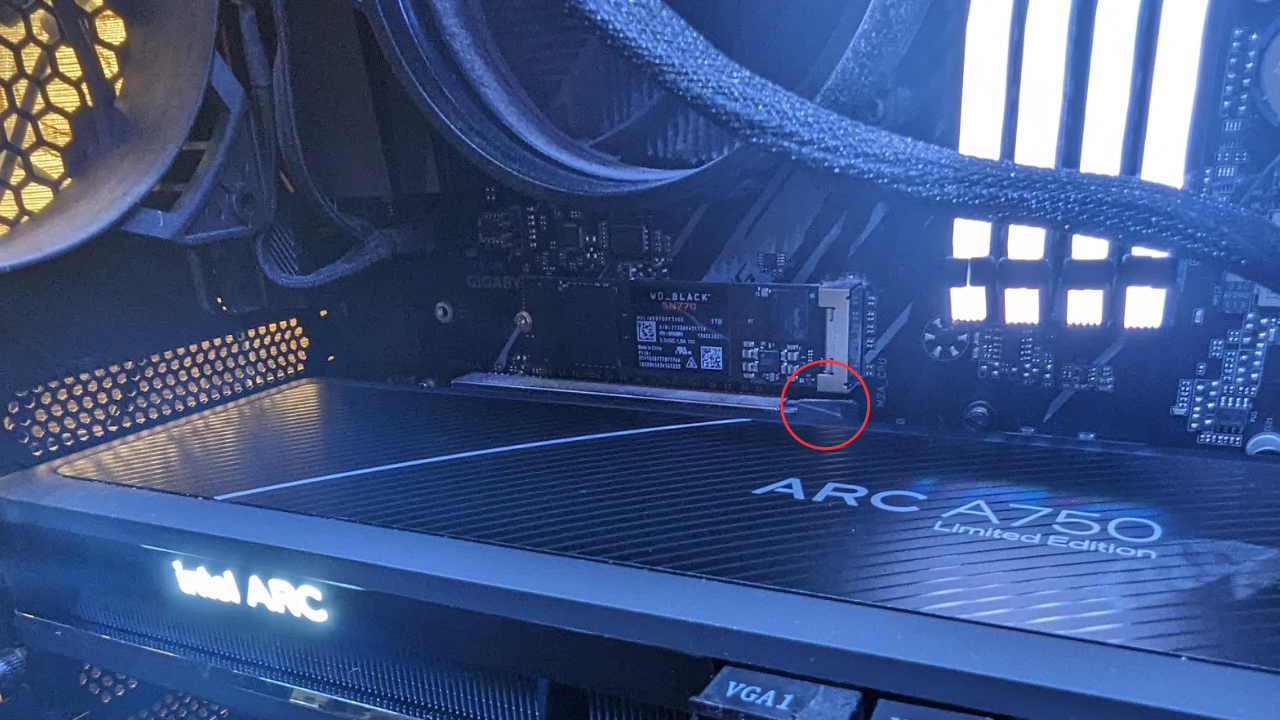
5. Insert your graphics card into the top-most PCIE 1×16 port with the appropriate inbuilt connector
This is the long port near the bottom left of your motherboard, as pictured above beside the red circle. Push the graphics card in enough for the tab to comfortably click in. Don’t push it in too hard – just enough for the tab to click in. Note that you may need to remove a plastic cover from the GPU’s PCIE connector.
6. Screw the graphics card into the case slots
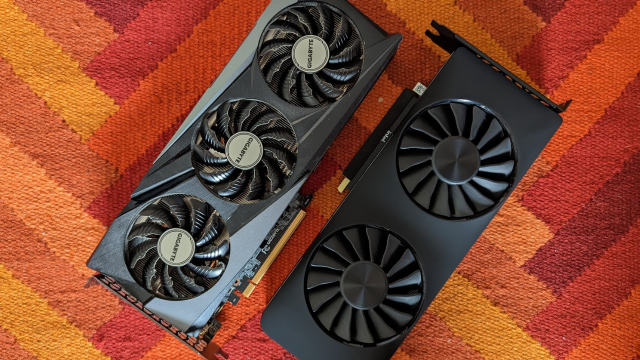
Using the screws that were previously holding the now removed PCIE case slots to the back of your case, screw the graphics card in and reattach the shield and any slots that don’t need to be removed (so that it looks like the first image from above).
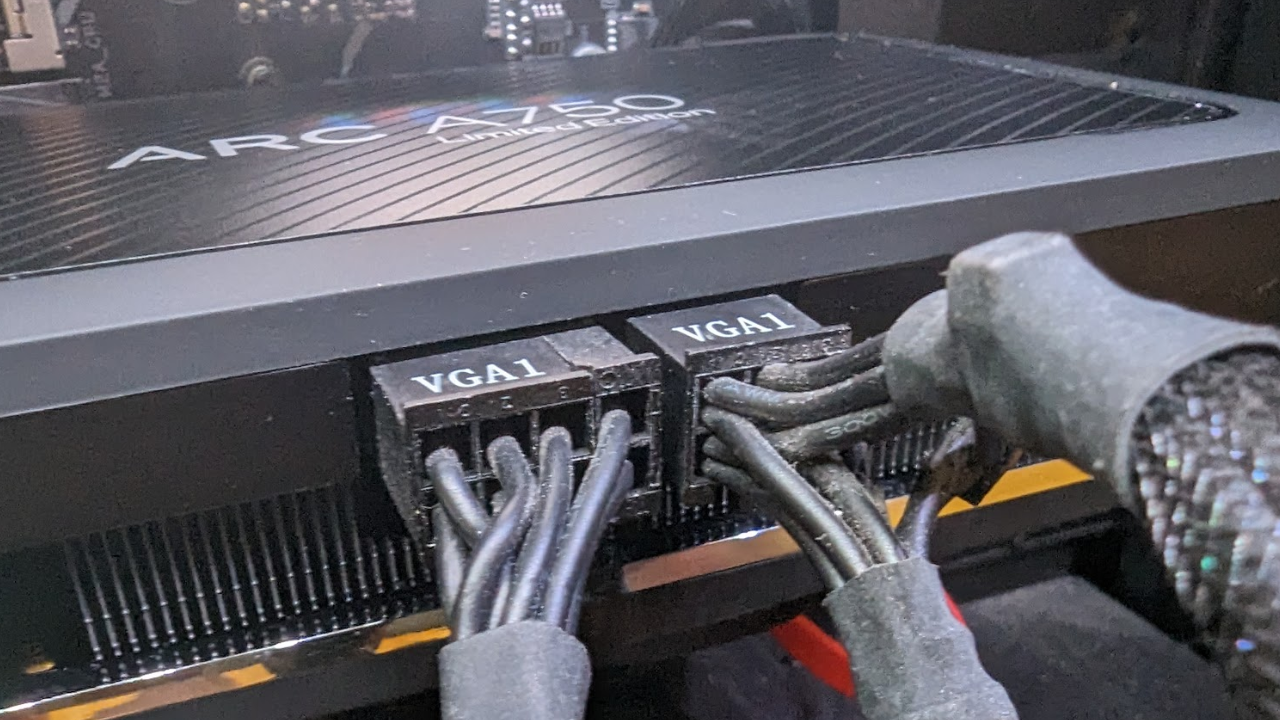
7. Insert the GPU’s power cables
These are ‘VGA’ cables that come from your PC’s power supply. Some graphics cards will need 1×8, while some will need up to 2×8, but it’s important that you use all the ports available otherwise it won’t run.
8. Plug your PC back in and boot it up
You may notice a slower booting time as the PC adjusts to the new card.
9. Log into your PC account and download GPU drivers
You’ll need to navigate to the appropriate support website for your GPU model. This could be either the AMD, Nvidia or Intel website, depending on the range your GPU is from or the website of the aftermarket manufacturer you’ve gone with. These sites will have drivers available for download. You can also install the automatic driver detection, update and optimisation tools from AMD, Nvidia or Intel, depending on your type of card:
10. Follow the installation process
Download the drivers, open the installation file and install as prompted.
After a reboot, your GPU should be functioning normally. But, if something unexpected is happening….
Do I need to update my BIOS to install a new GPU?
While it’s unlikely that you’ll need to update the BIOS of your motherboard when installing a GPU, you may need to do this to get the best-recommended experience. For example, Intel Arc cards are recommended to be paired with a motherboard supporting Resizeable BAR – a motherboard setting that only rolled out to some boards in the past three years through updates. This setting lets CPUs access VRAM on your GPU, allowing for theoretically faster rendering times, ergo faster FPS.
To update your BIOS, you’ll need to navigate to the manufacturer’s website and download the files manually onto a USB (which you’ll then access via your BIOS directly when you enter it on startup). Tech Advisor has a great guide on the process here.
Why is my computer bluescreening after installing a new GPU?
Firstly, don’t panic, this happens a lot. When making any hardware modifications to a Windows machine, the operating system may report a fault. It likely just needs to wipe the memory of the previous GPU and uninstall its drivers (which may be causing software errors).
There’s also a small chance that you’ve installed a faulty GPU which, in this case, you should remedy by contacting the manufacturer and reseller.
Do I need to update the drivers?
Yes – at least when you first install the device, so that it runs right. It’s a good habit to regularly update your drivers, be it manually through the manufacturer’s website or automatically through an app provided by either Intel, AMD or Nvidia, but if you’re not staying on top of driver updates, it’s likely that newer graphics-intensive apps and games won’t run optimally.
If a game is experiencing issues after a recent driver update though, know that you can roll back to a previous driver version through the Intel, AMD or Nvidia website (or website of your aftermarket manufacturer).
Do I need to use the monitor ports on the back of the GPU?
Sticking out from behind the PC case, with a GPU installed, should be a row of monitor ports – usually an array of HDMI and DisplayPort connectors. You’ll need to use at least one of these if you want your computer to utilise your GPU – if your motherboard has a DisplayPort or HDMI connector, just don’t use it.
What if my GPU isn’t running?
Make sure the GPU is plugged in correctly, but if it is, there may be something wrong with the card, or the power supply may be inefficient. In this case, investigate the watt output of your power supply and the requirements of your GPU. If the requirements are met, then contact the manufacturer.
And that’s it, really. If you reckon there’s a point we haven’t covered in this GPU install guide, feel free to shoot me an email.