Ever had the feeling your high-resolution desktop wallpaper isn’t looking quite as fantastic as you thought it should? It could be because Windows 10 actually compresses the image, presumably to save space. Windows users have been complaining about the problem for months. Luckily, there is a way to make sure you’re always seeing the best-resolution image on your display.
Image: Microsoft
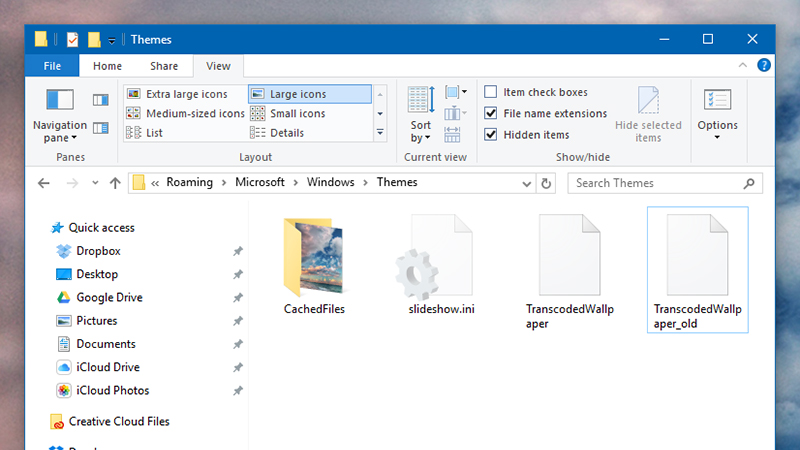
The simplest fix is to replace the compressed image that Windows is using. Go to C:Users<your user name>AppDataRoamingMicrosoftWindowsThemes and you’ll find a file there called TranscodedWallpaper, without an extension.

Image: Screenshot
Rename this file to something else, copy over your high-resolution original image to the same folder, and rename it “TranscodedWallpaper”, again without the extension. You also need to delete the CachedFiles folder, if there is one.
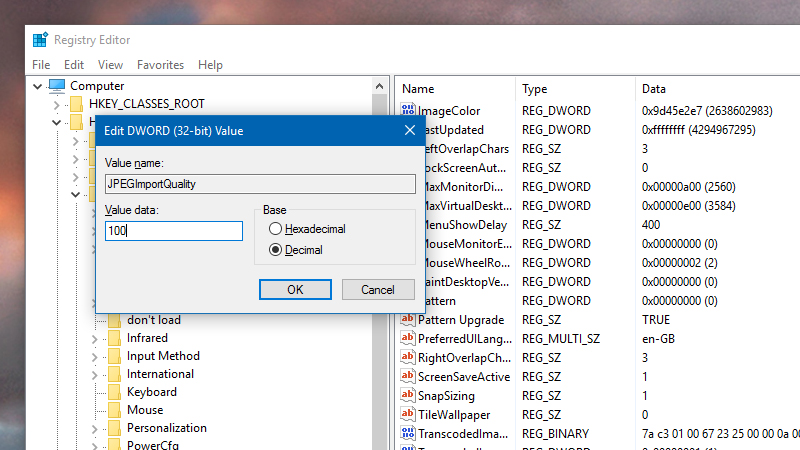
To switch off compression permanently, head to the Windows registry editor by typing “regedit” in the Start menu search box and choosing the top option. Navigate to HKEY_CURRENT_USERControl PanelDesktop and create a new key by right-clicking inside the pane on the right and choosing New then DWORD (32-bit) Value.

Image: Screenshot
Call your shiny new DWORD “JPEGImportQuality” (without the quote marks) then double-click on it to modify it. Set the Base to Decimal and the Value data to 100, click OK, and you’re done: the 100 represents 100 per cent image quality.
While the default compression may not be too noticeable on some photos, it can clearly be seen on certain images. Presumably it’s done to keep Windows nippy as you move around, but if you want to make sure you’re always seeing the best picture possible, now you know how to do it.
