
Looking to learn how to back up your iPhone? It helps to know how to access these iPhone backups, too.
Well, good for you. This is an important lesson and if you do it regularly, it should prevent you from ever having the dreaded feeling of losing years’ worth of photos, important files and contacts.
How to back up your iPhone
We’ve got four methods, starting with auto backup.
How to back up your iPhone with auto backup
iPhones come fitted with a handy auto backup option that takes most of the leg work out for you. However, if you’re not paying for extra iCloud storage, you will hit your capacity super quickly, which prevents the auto backup from working.
If you do pay for iCloud storage, this is a super simple process to set up:
- Navigate to Settings
- Tap on [your name]
- Select iCloud
- Then iCloud Backup
- Now, toggle on Back Up This iPhone.
It truly is that simple.
From here, you can choose to back your iPhone up manually by tapping Back Up Now. Under this text, you can also see the last time your handset was backed up.
When iCloud Backup is on, your device will automatically back up to iCloud every day when your iPhone is plugged in, locked and connected to Wi-Fi.
Just a note – on models that support 5G, your carrier may give you the option to back up iPhone using your cellular network. If you don’t want this to chew through your mobile data, you can toggle off Back Up Over Mobile Data.
Manual iCloud Backup
If you’re not keen to set up auto backup or, like me, often keep a lot of useless junk on your phone that you’d like to delete before performing an iCloud backup, you can also do this manually. We touched on this above already, but the steps are
How to perform a manual iCloud backup for iPhone:
- Navigate to Settings
- Tap on [your name]
- Select iCloud
- Then iCloud Backup
- Now, tap Back Up Now.
Under this text, you can also see the last time your handset was backed up.
[related_content first=”1713824″]
How to back up your iPhone using your Mac
If you’re not paying for an iCloud subscription, don’t fret, you can still back up your iPhone using a computer.
- Connect your iPhone to your Mac via Lightning cable
- Open a new Finder window (macOS 10.15 or later is required, earlier versions will need to use iTunes)
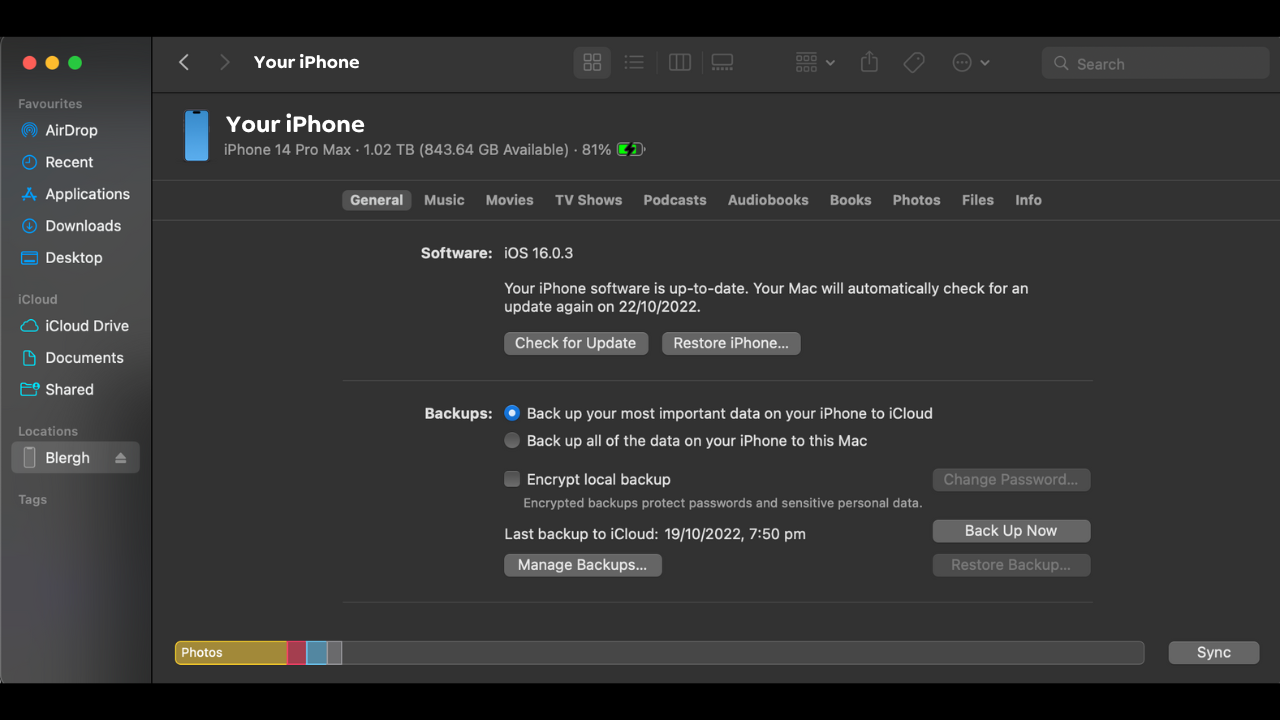
- In the Finder sidebar, select your iPhone (should be under Location)
- Select Back up all of the data on your iPhone to this Mac
- You can opt to encrypt the backup with a password by selecting Encrypt local backup. However, this is optional
- Select Back Up Now.
You can also connect iPhone to your computer wirelessly if you set up syncing over Wi-Fi.
PC Backup
Alternatively, here’s how to back up your iPhone onto a PC.
- Connect your iPhone to the computer with a Lightning cable
- Open the iTunes app (you’d have to have this downloaded and installed already)
- Click the iPhone button in the top left corner of the window
- Select Summary
- Select Back Up Now (which is below Backups)
- You can encrypt your backup by selecting Encrypt local backup. If you choose to do this, you’ll be required to type a password then select Set Password.
To see the backups stored on your computer, choose Edit, then Preferences, then click Devices. Encrypted backups have a lock icon in the list of backups.
You can also connect iPhone to your computer wirelessly if you set up syncing over Wi-Fi.
And there you have it!
This article has been updated since it was first published.