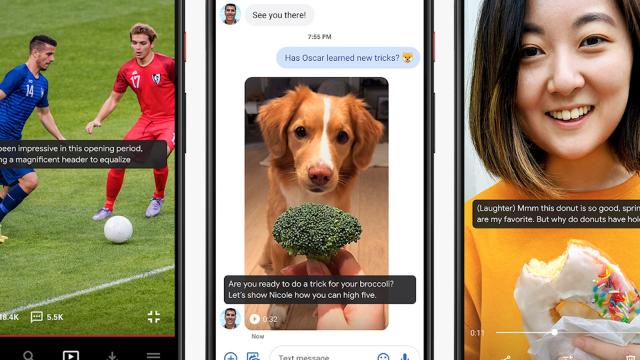
Captions on services such as Netflix or YouTube are essential for those with hearing issues — and they’re a handy option for everyone when we’re in loud environments or have to watch videos in silence. Now our phones and laptops have grown smart enough to start captioning both audio and video streams automatically.
That means, no matter where you’re watching or listening to something, whether it’s on social media or in a podcast app, you can get access to captions. The development of this feature is at different stages on different platforms, and the AI behind the technology isn’t always reliable, but it’s now something you can access on just about every device.
Android
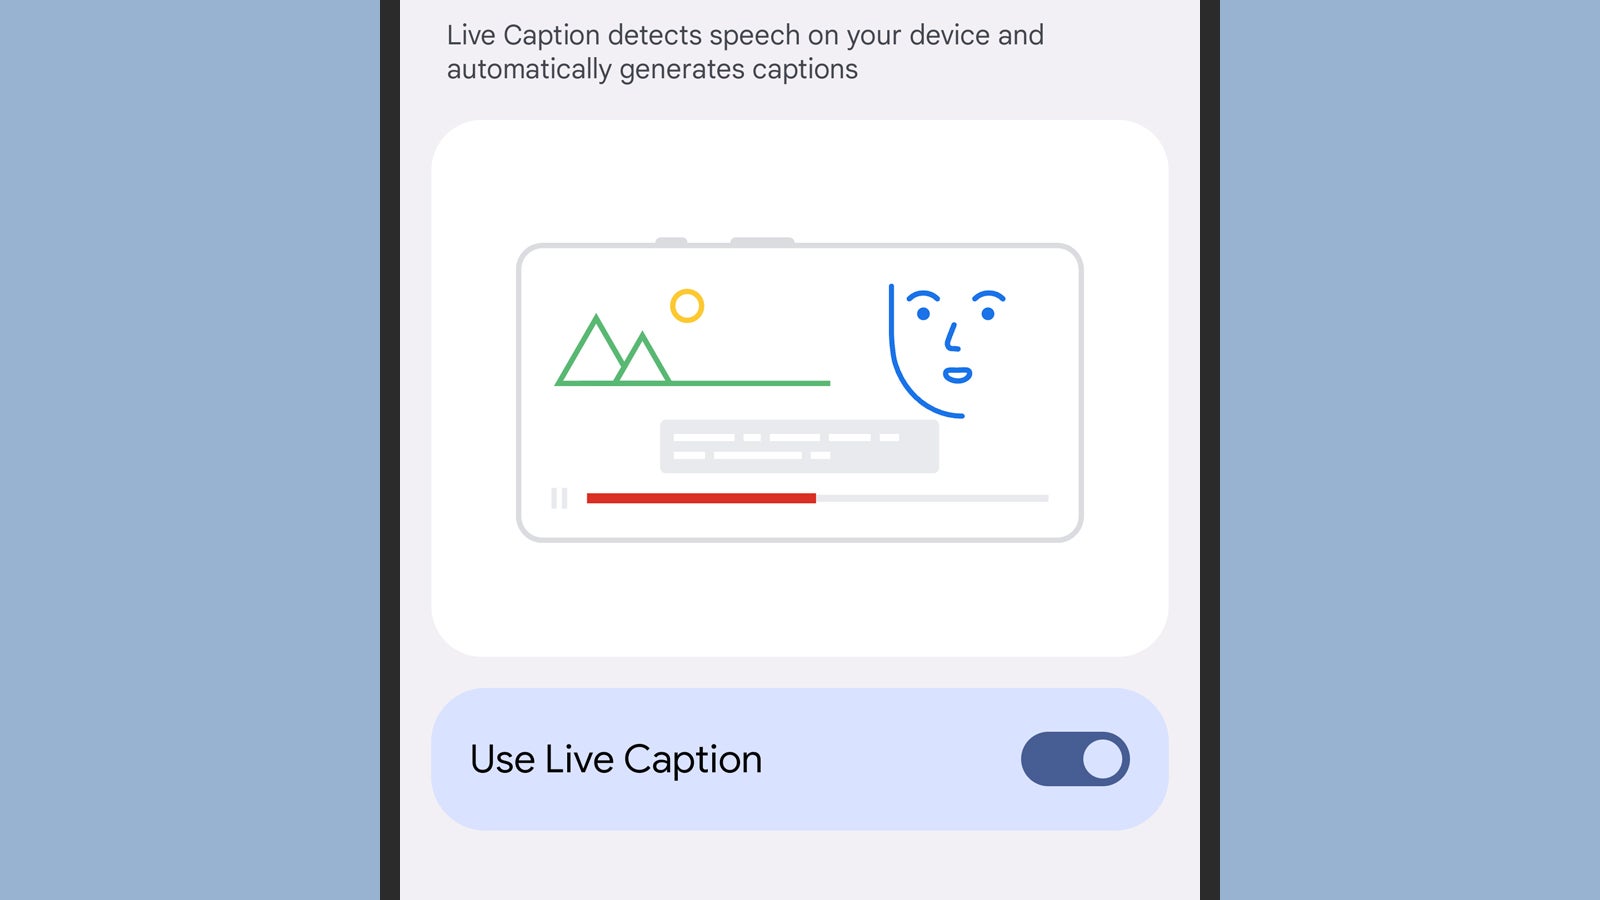
At the time of writing, Live Caption on Android works on Pixel phones and what Google describes as “other select Android phones” — so your own handset may not have it. On Pixel devices, open Settings, then go to Accessibility and Live Caption, then toggle on the Use Live Caption switch. You can also get to it by pressing a volume button, then tapping the bottom icon on the slider that appears.
The same technology is implemented on recent flagship Samsung Galaxy phones, though it’s located in a slightly different place. If you’re on a Galaxy handset, you need to head to Accessibility from Settings, then select Hearing enhancements and Live Caption. Again, you’ll see a straightforward toggle switch together with the same options that appear on Google phones (including an option for blocking out profanity).
That’s all there is to it — whenever audio or video is playing and speech is detected, you’ll see live captions appear in the centre of the screen. Note that the feature works regardless of where your phone’s volume level is set, so you can have your handset muted and captions will still show up on the screen.
iOS
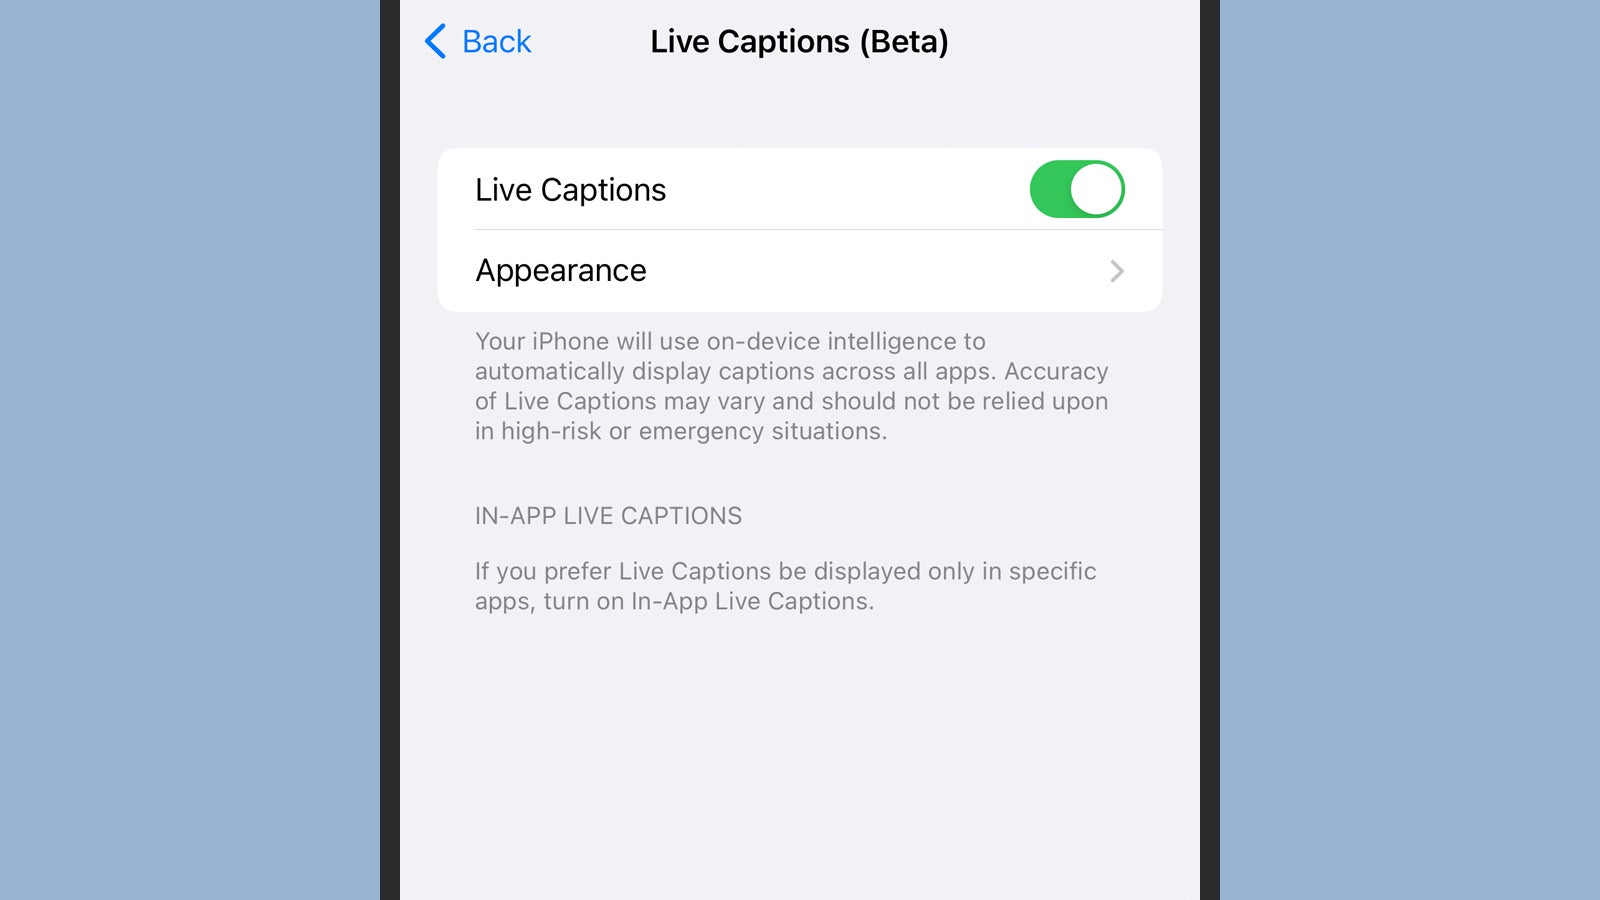
If you’re using an iPhone 11 or later, live captioning is available in beta form, so proceed accordingly — you may see one or two issues along the way (and for now it’s only available if your phone is set to use US English). Overall, the feature should work fine. To enable it, open up the iOS Settings screen and select Accessibility, then Live Captions (Beta).
Set the Live Captions toggle switch to on and iOS will start listening out for audio — you’ll see an overlay at the bottom of the screen to this effect. You can also tap on Appearance to change how the live captions actually appear on screen, by adjusting the text size, the colour of the text, and even the opacity of the overlay to suit yourself. You may also see certain apps listed that you can turn on live captions for individually.
Start playing something through an app with audio attached and the captions should appear on screen, whether or not your phone is currently muted (though you may have to wait for the necessary files to download first). It’ll even work on live conversations that are happening around you. Tap the floating overlay for more options (including the option to pause live captions).
Windows
Live captions are now available in Windows 11, as long as you’ve installed the major 22H2 update of late 2022 — to check on this, open up Settings and select System and About, then look under the Windows specifications heading, where you should see the version number. If you’re not up to date, click Windows Update on the left.
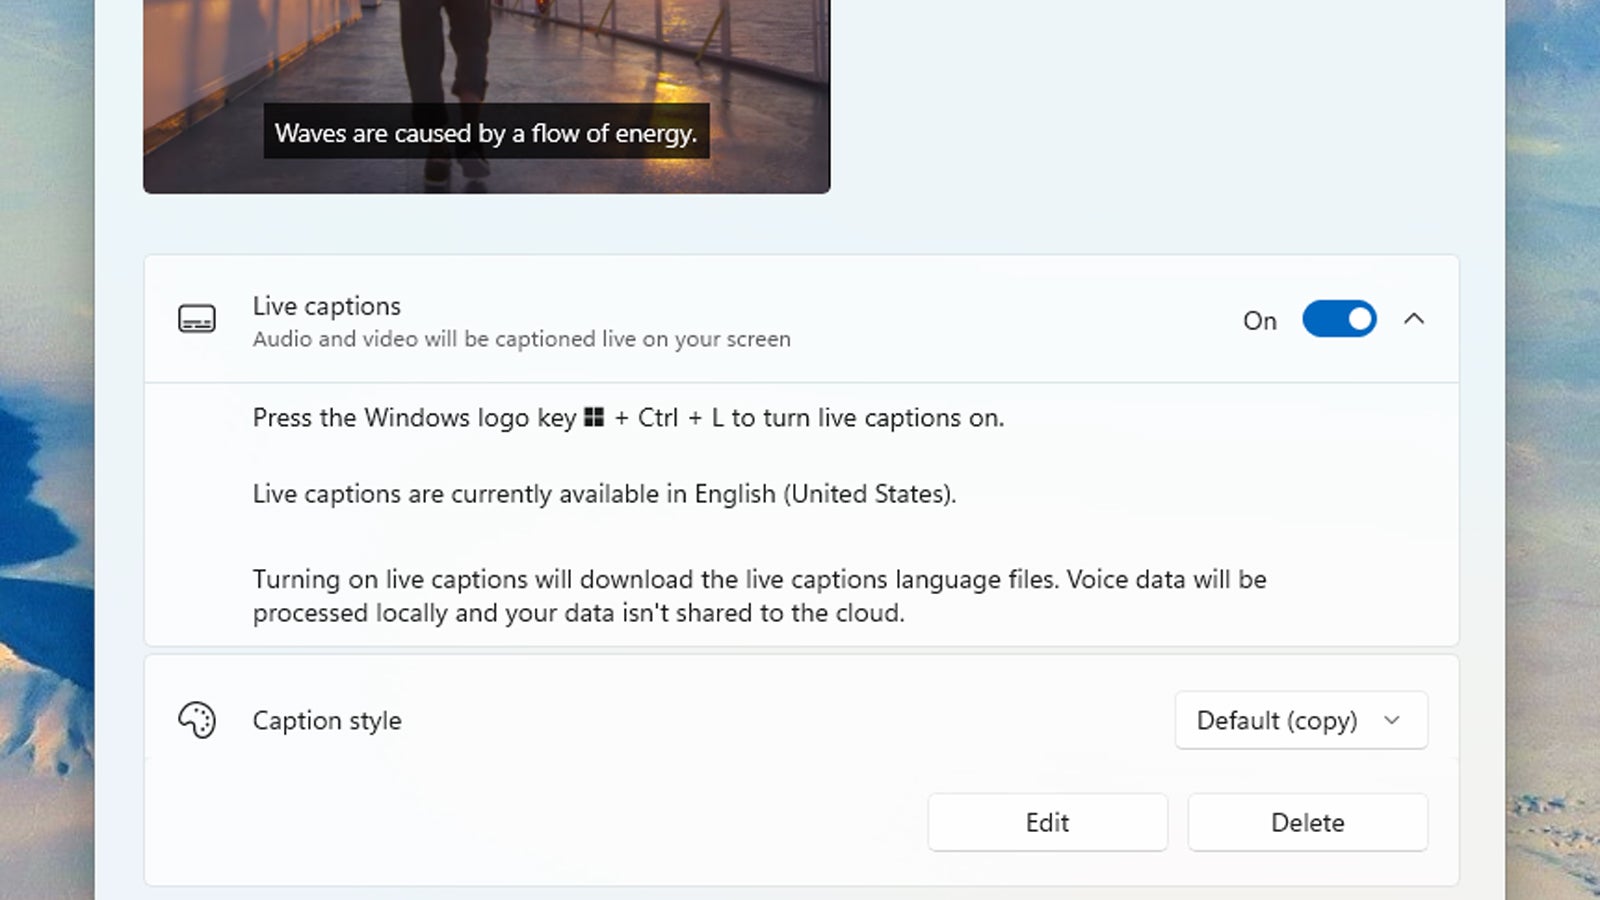
From the front Settings screen, choose Accessibility, then pick Captions. The screen that then appears has a Live captions feature that you can turn on or off, and you’ll see a preview of how the subtitling is going to look on a little thumbnail. Further down the screen, you can make changes to the appearance of the captions. You can also turn live captions on or off by pressing Win+Ctrl+L.
In Windows, the captions appear in a large bar across the top of the screen, and you’ll see words start to appear once you start playing some audio or video (click the cog icon in the top right corner to tweak the feature). This all works independently of Windows’ volume settings, so you can have your computer muted and still see the captions.
macOS
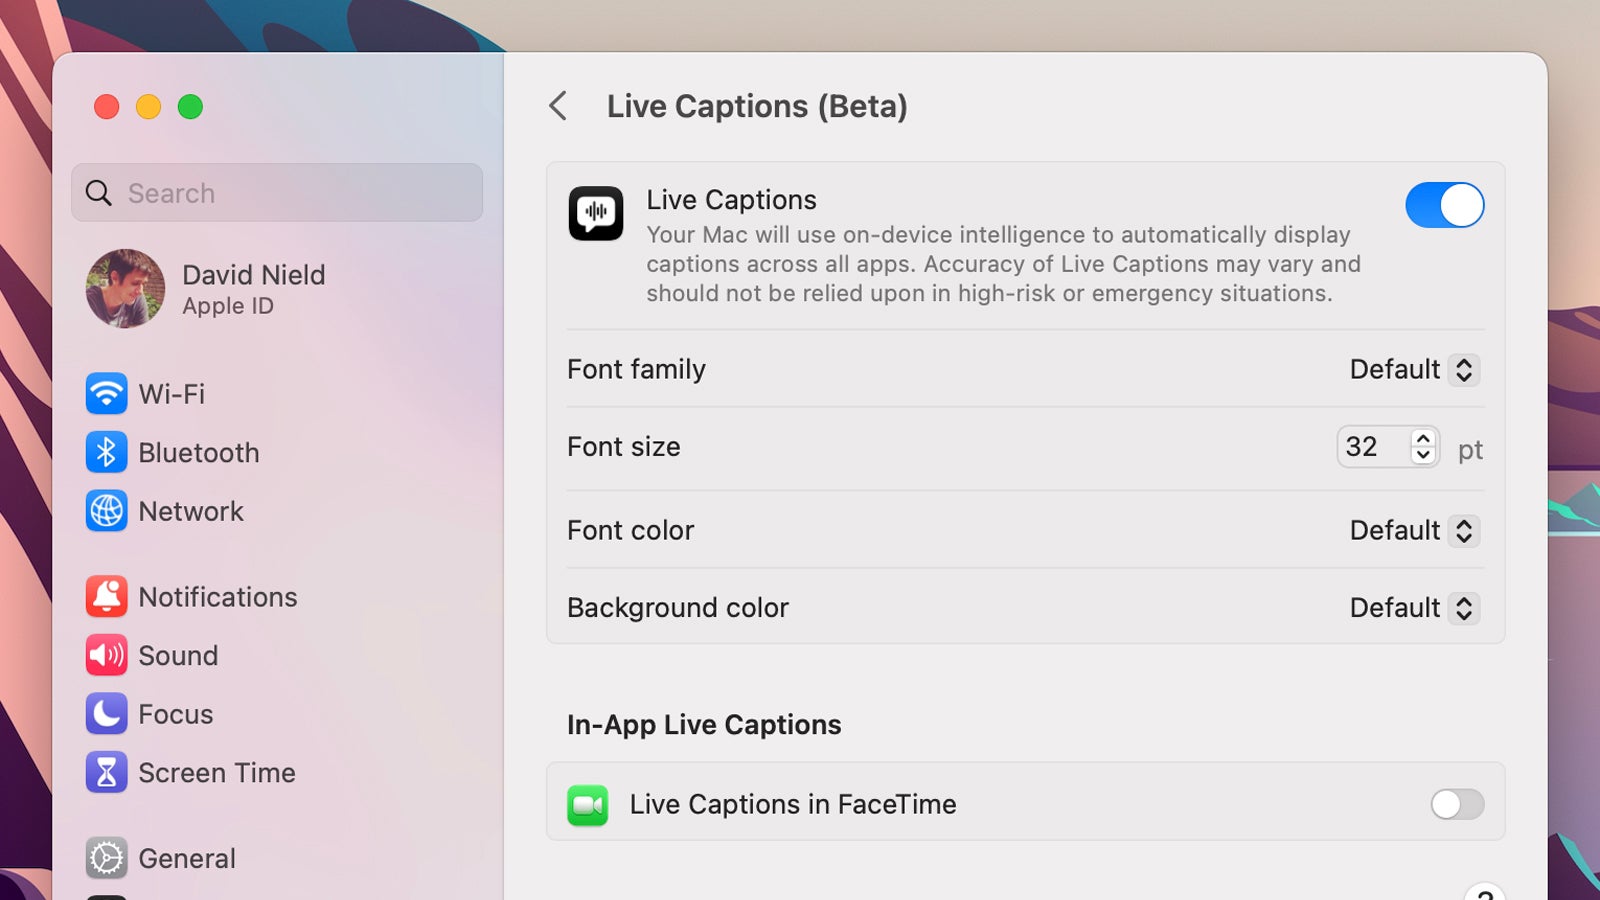
When it comes to macOS, the feature is again in beta, so you may notice one or two bugs — you’ll need the latest Ventura version of the OS (set to US English) and a Mac running Apple silicon under the hood to get live captions. Open the Apple menu, then click System Settings and Accessibility, and you’ll find the Live Captions (Beta) option.
Once you turn the Live Captions toggle switch on, you’ll see the captions overlay appear on screen, and macOS will start downloading the necessary language files. On the same settings screen, you can make adjustments to the text size and the style of the captions, and you might also see toggle switches for live captions in individual apps.
Start playing something with audio, whether that’s a FaceTime call or a YouTube video, and captions should start appearing on screen (no matter how high or low your Mac’s volume is set). Click and drag on the captions bar if you want to reposition it, and click on the pause button if you want to temporarily put a halt to live captioning.
Chrome
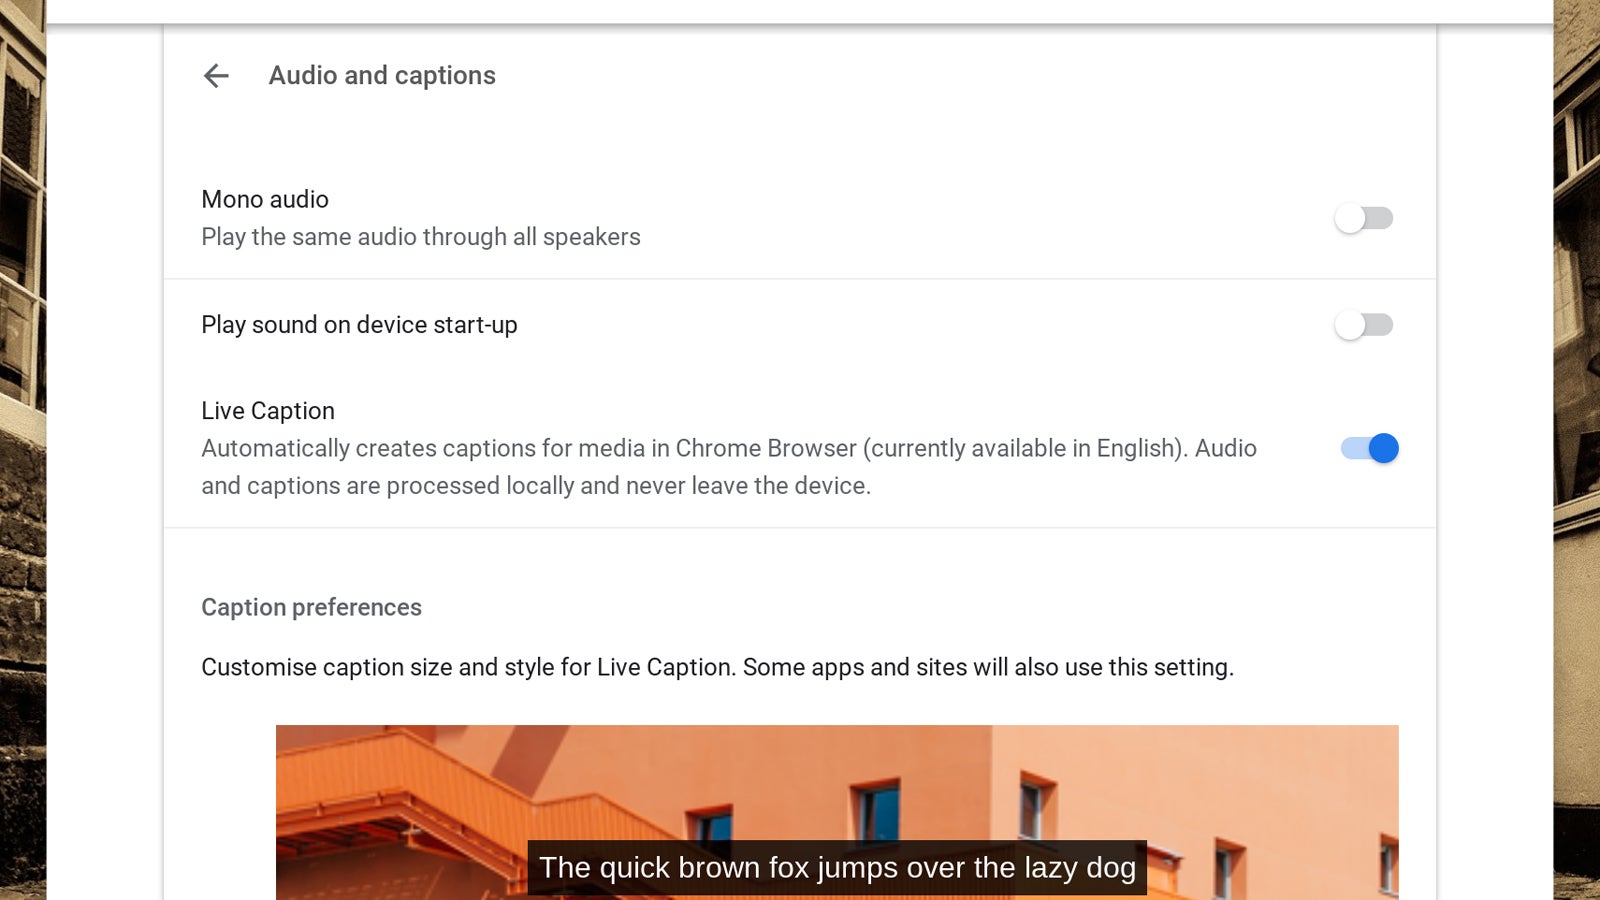
Live captioning is supported in Google Chrome as well, which means you can use it in the browser on Windows and macOS, and it of course comes in handy on Chromebooks too. If you’re running the latest version of Chrome or ChromeOS and it’s set to English, then the live captions option should appear.
In any browser tab, click the three dots (top right), then Settings, then choose Accessibility. In Chrome, you’ll see the Live Caption toggle switch straight away; in ChromeOS, you need to select Manage accessibility features and then Audio and captions before you get to the Live Caption setting.
You’ll have various options for the captions on the same screen, including the colour and the size of the text and the opacity of the overlay that appears on screen. When you’ve got everything looking the way that you want it to in the preview, you can start playing audio or video in any browser tab to see captions, with or without the volume muted.