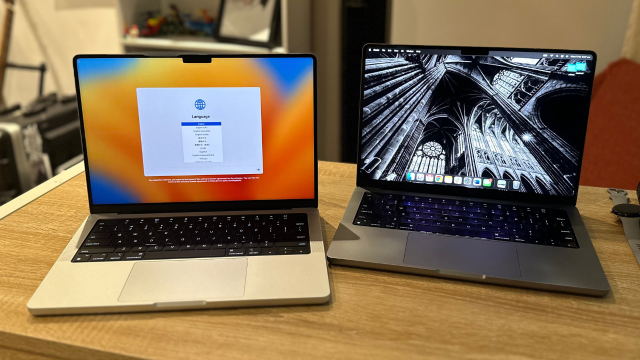
I’m currently reviewing the new M2 MacBook Pro, and as I use the previous Pro (the 2021 14-inch model featuring the M1 Max chip) every day for work, I didn’t want to start right back at the beginning, logging into everything, downloading apps I need, etc – I just wanted to pick up where I left off, but with a faster machine. Lucky, Apple has a MacBook feature called Migration Assistant to make this seamless.
While a lot of people might prefer to use a new laptop as an opportunity to Marie Kondo your digital life, I was too pressed for time. In hindsight, I would have gone through all of my files to delete that which I do not need anymore. Lesson learned, but one I wanted to bring to your attention to save you some pain.
The whole process took 1.5 hours. When migrating my old MacBook to this new one, I was confronted by an alarming ’37 hours to complete’ but that quickly shortened.
Setting up your new MacBook using Migration Assistant
Just like with an iPhone, there’s an easy way to duplicate your old MacBook on a new one: it’s called Migration Assistant.
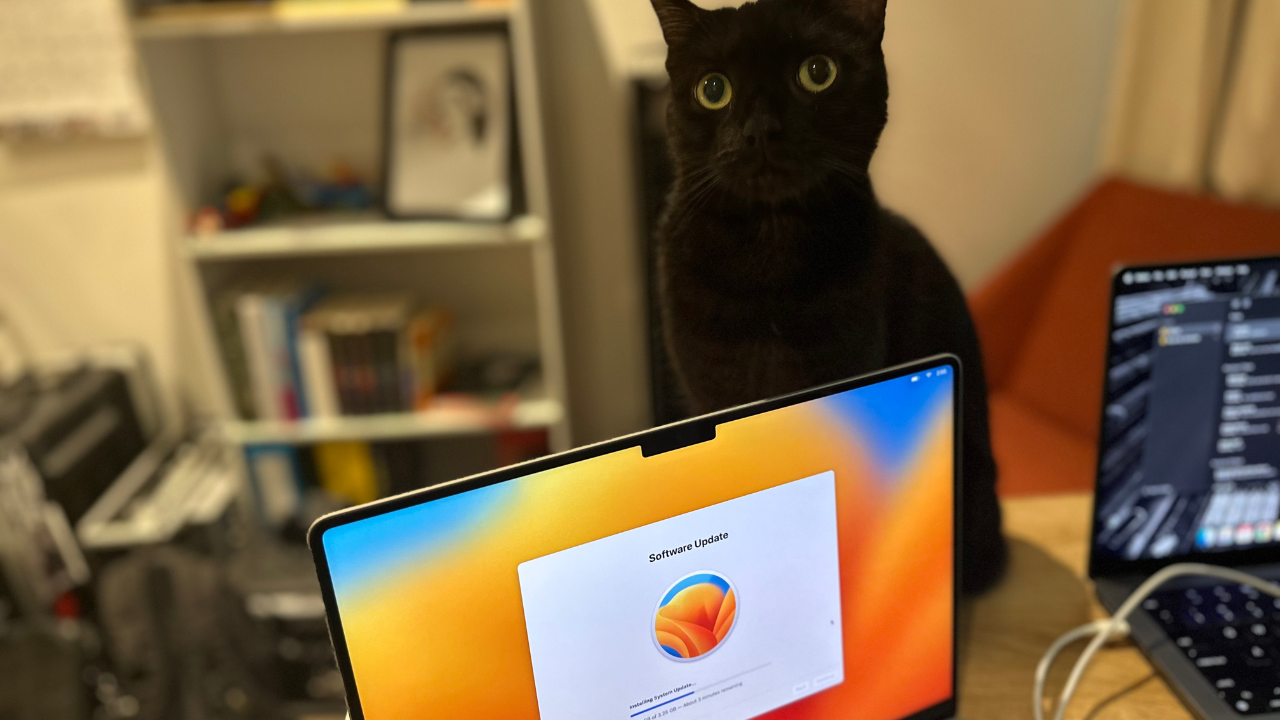
Step one is to turn on your new MacBook, select your language, your country or region, any accessibility features you may want to use, then connect to the internet. Then, you’ll need to update the MacBook’s software (I waited about 30 minutes for this to download and install).
After this is complete, you’ll need to repeat the process of selecting your language, your country or region, any accessibility features you may want to use and connect to the internet (again). Now, you’ll progress to the page requiring you to accept Apple’s data and privacy policy.
Then, a pop up on your MacBook for Migration Assistant will appear.
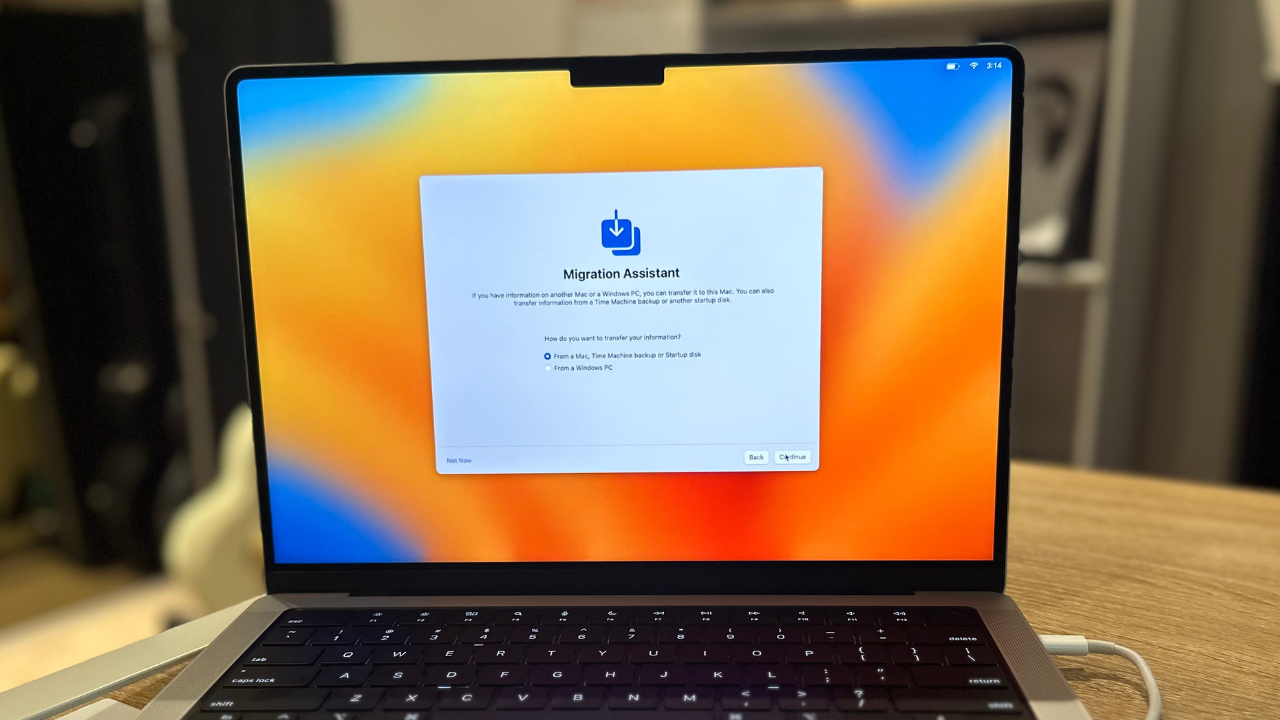
The pop up gives you two options: transfer from another Mac, Time Machine backup or Startup disk and from a Windows PC. We opted for ‘from another Mac’. With the new MacBook connected to AC power, plug a Thunderbolt USB-C cable into both machines.

Then, turn your attention to your old MacBook. Head to your Applications Folder, then the Utilities folder, open up the Migration Assistant app and select ‘to another Mac’ to transfer information from your old MacBook. Tap continue. On your new MacBook, select the machine you want to copy data from, then hit continue.
Over on the old Macbook, you’ll see the Migration Assistant working hard to locate all the info that can be copied over. On the new Macbook, you’ll be presented with a summary. Mine said there was about 90GB of info to transfer across Applications, the Asha Barbaschow (Apple ID) folder, ‘other’ files and folders and System & Network settings. You’ll then need to determine which of that information you want to carry over. Hit continue once you’ve made your selection. You’ll then need to agree to Apple’s Ts & Cs.
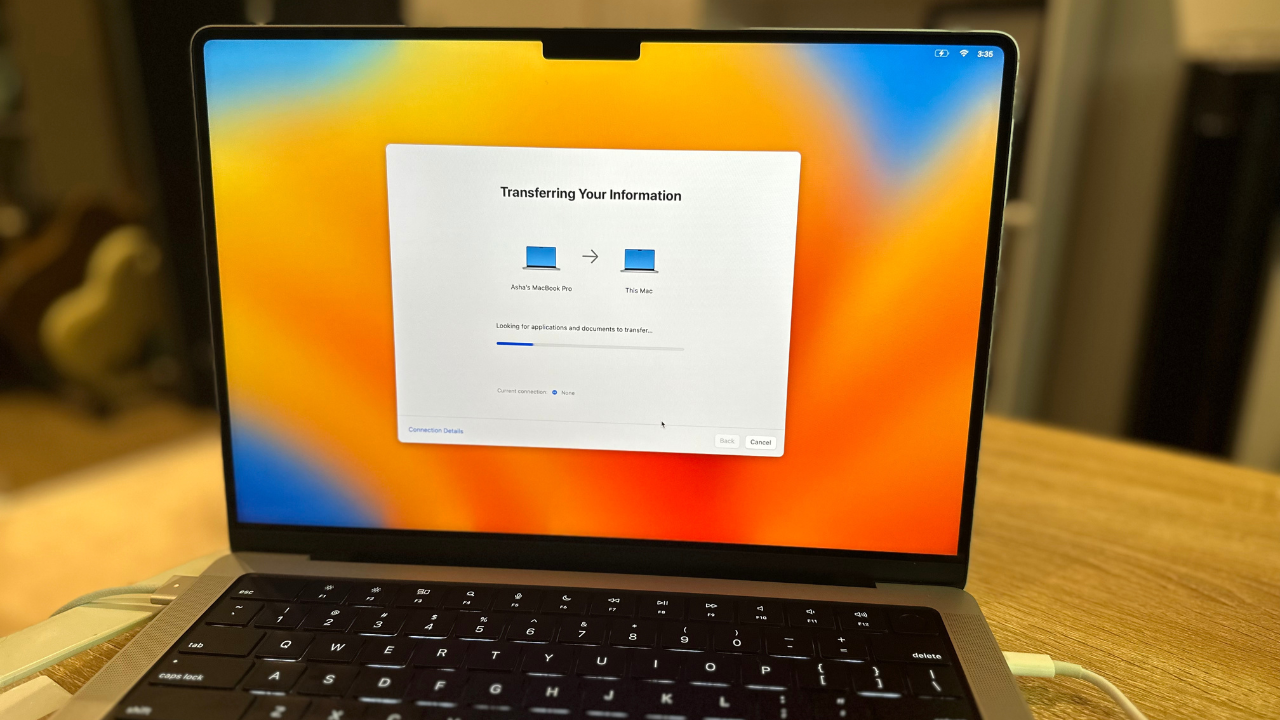
It’ll then start transferring, giving you a running update on how many files have been transferred on both devices. Don’t have a heart attack like I did when this popped up:

Within nine minutes it had dropped from nearly 37 hours to 1 hour 20. About 45 minutes later, it was complete. You’ll know when it’s done as the old MacBook will say migration complete and the new MacBook will give you a migration summary, followed by the same migration complete popup.
On the new MacBook, sign in using your Apple ID, confirm on another Apple device that this activity is legit and enter a password for your user account (you can no longer use the same password for both iCloud and user accounts). Moving through the rest of the setup is up is straight forward, but once you’re done, you’ll know if Migration Assistant was a success by simply seeing your old MacBook’s wallpaper appear on your new MacBook, as well as any desktop folders/files you had.

Slack was logged in, but Microsoft Word required me to confirm my password, and using Chrome, the handful of pages I save passwords from were still logged in and all of my photos, screenshots and documents were there. Magic.
While it took me 1.5 hours, I had thousands upon thousands of files on my old MacBook, so your timeframe may differ, but your Migration Assistant experience should be as seamless.