AI is quickly becoming adept at producing everything from song lyrics to movie posters to video storyboards with just a few text prompts. Microsoft has been busy trying to stuff as many of these AI tools as it can into its Edge browser, but there’s one powerful Microsoft AI tool that you may have missed so far: Microsoft Designer.
Microsoft Designer launched last October but has only just been made available for anyone to try, no longer requiring a waiting list — though it’s worth noting that the application is still labelled as a preview. It’s a piece of graphic design software that will produce whatever you ask for in the form of a text prompt.
The tool is intended for use with prompts like “a back to school poster for my classroom” or “an Instagram post promoting my new beauty salon.” As with many of the other AI tools growing in popularity right now, the more details you can add, the better, although Microsoft Designer can produce very decent results from shorter prompts too.
The idea is that you can create something to share on social media or print out without having any digital art skills whatsoever: It’s quick and easy to use. Here, we’ll show you how to get started with Microsoft Designer, plus give you an idea of what it’s capable of.
Choose your prompts
Open up the Microsoft Designer interface on the web. Before you do anything else, you’ll need to sign in with a Microsoft account. Microsoft is apparently going to keep the basic parts of the tool available for free, and is building it into Edge as well, but eventually some of the more advanced features will require a Microsoft 365 subscription.
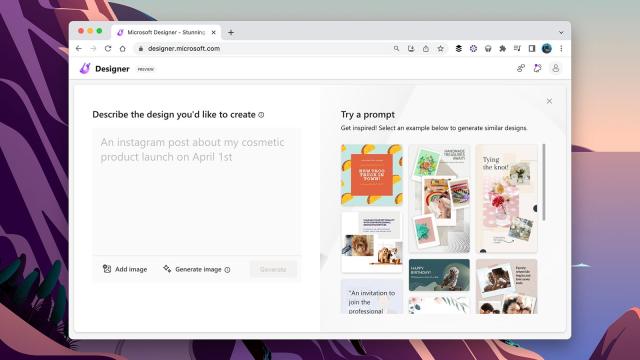
Once you’re into the app, you can get started right away by typing a prompt into the box on the left: Explain what you want to create and how it’s going to be used (as an email attachment, or a Facebook post, or a printed poster, or whatever). With your prompt entered, click Generate, and you’ll see a range of options on the right — hover over any of them and click the magnifying glass for a closer look.
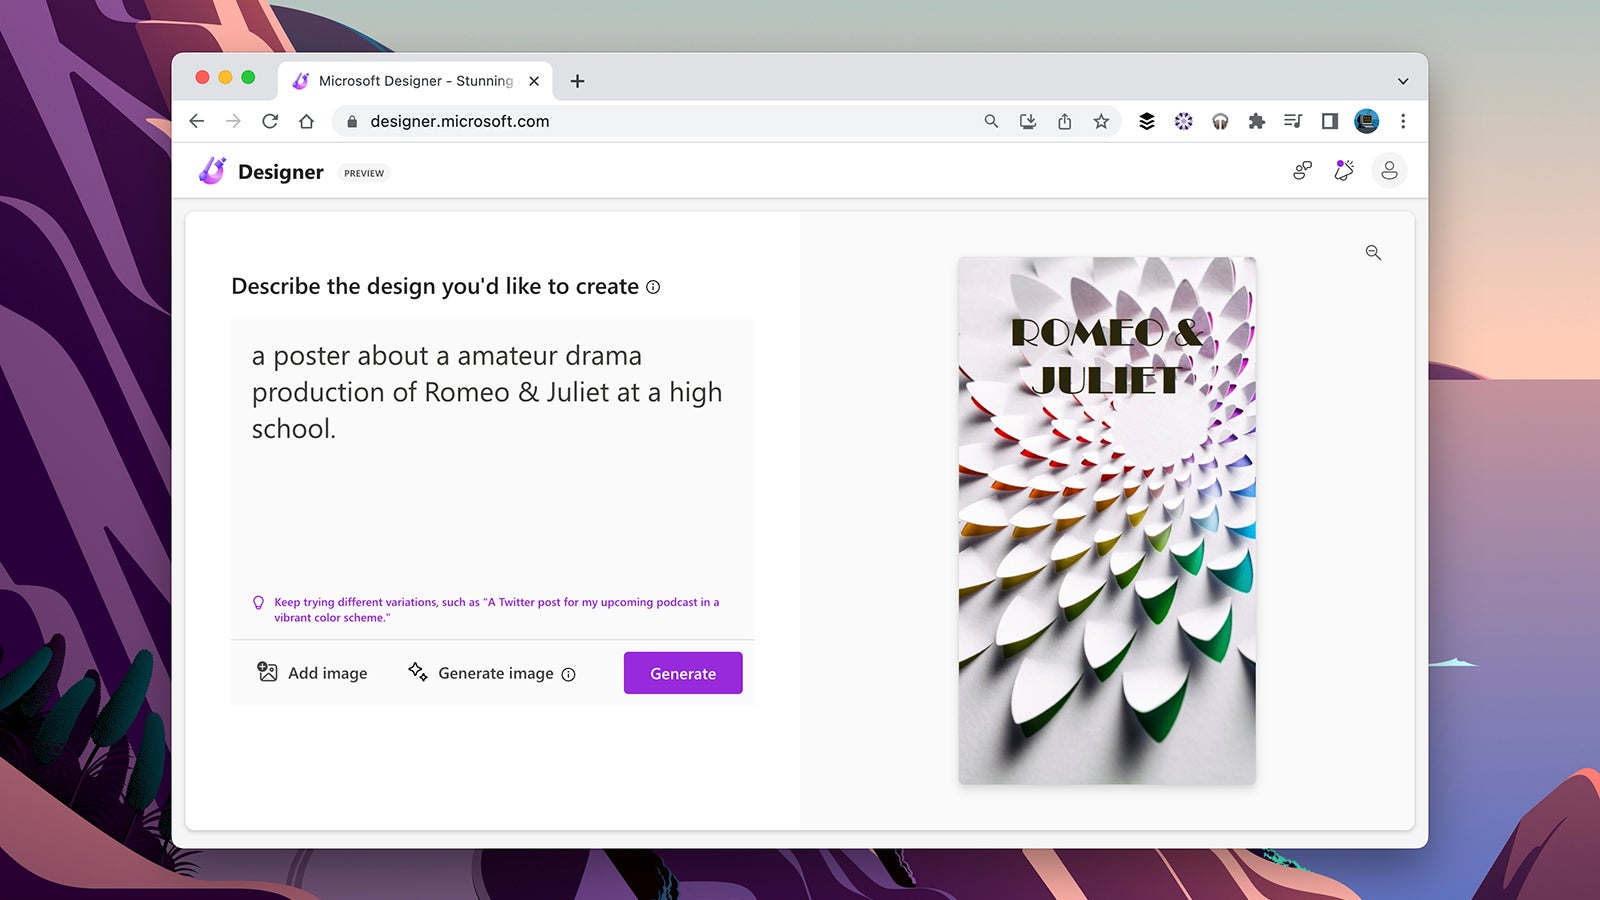
You can continue to tweak your prompt as necessary. For example, you might want to describe a specific aesthetic style or colour scheme that you want Microsoft Designer to use, or there might be a particular object that you want included. Note that you can get the AI to write text as well, like a tagline for whatever it is you’re launching. Just include the details in the prompt you’re writing.
If you already have an image that you want Microsoft Designer to work with, click Add image and you can pick it out from your local hard drive. You can also enlist the help of the Dall-E image generator and produce an image from a text prompt (so AI within AI): Click on Generate image and then follow the instructions. When you’ve got an image you’re happy with, you’ll be able to insert it into your design.
Customise your designs
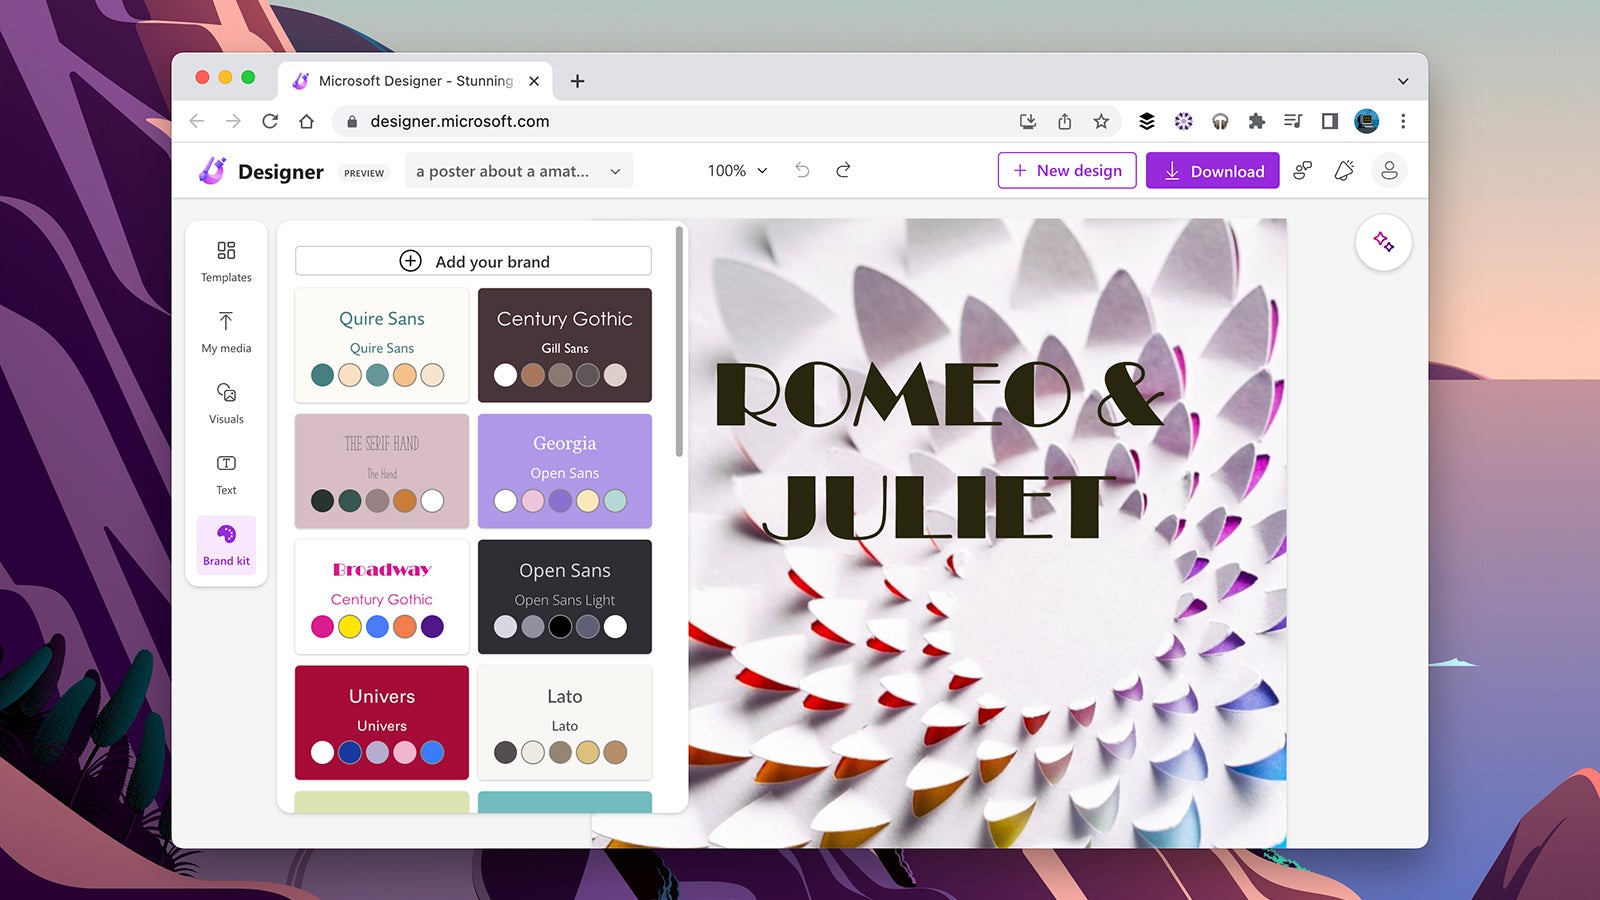
After you’ve carefully refined your design and got yourself a result that you like, select it from the panel on the right and pick Customise design underneath. This will take you to the next part of the Microsoft Designer interface, where you can tweak what the AI has given you. For example, click Templates to change the layout of the design.
Select My media to load in images from disk, or Visuals to see assets suggested by Microsoft Designer: Photos, shapes, videos, and other elements that match the theme of whatever it is you’re putting together. Use Text if you want to drop in headings, taglines and other text elements, and click Brand kit to have the app suggest a font style and colour scheme for you (as determined by AI, of course).
The Ideas button (the glowing stars) over on the right is interesting: click it and you’ll get some suggestions for how your design could be tweaked. Up at the top, you can switch between the different designs you’re working on, save the current design to disk, and undo recent changes (handy if you’ve gone in a direction you no longer like).
Click on individual elements inside the design to make changes to them (to crop images, for example). You also get basic tools for changing the layering of elements in your design. It’s worth checking back often on Microsoft Designer, too: There are features coming soon to enable you to expand backgrounds or erase objects through the use of AI, much as you can in other software such as Photoshop.